If somebody asked you to recite the notes in the C major scale, without hesitation you'd be able reply:
C - D - E - F - G - A - B - C
However, if they asked you do do it backwards, odds are you'd be stumped!
KNOW YOUR CBA's
Your probably wondering why you should be able to recite the alphabet backwards. Learning the fretboard is one reason.
As a beginner you learned the names of the open strings and probably learned the names of the notes on the first 3 frets. However, as you move beyond the 3rd fret, your note naming ability might be a bit shaky. And the closer you get to the 12th fret, the more lost you feel.
But wait! You already know the names of the notes at the 12th fret. Remember those notes are the octave of the open strings. If you can name the open strings, you can name the notes at the 12th fret.
If you can name the notes at the 12th fret and you know your CBA's, then you can easily name the notes before the 12th fret. For example, the 12th fret of your sixth string is an E. "Counting" backwards from E you get to D, which is a whole step before E (if you don't know why D is a whole step before E, see Confession #8 - Learn the Major Scale!), so moving a whole step (i.e. two frets) back from the 12th fret to the 10th fret you find a D.
How do you learn your CBA's? Practice!
Use the major scale pattern in Confession #8 - Learn the Major Scale!and play up and down the scale, naming the notes as you play them (or better yet, sing them! See Confession #23 - Sing What You Play!). Moving up the scale will be easy. Moving down the scale will be hard at first but will quickly become easy.
One of my goals when I started getting serious about the guitar was to learn to sing and play. I've learned to do that, but my singing needs a lot of work. Of course, time is tight and I never really get any dedicated singing practice time, so progress has been glacial.
Recently I've started teaching one of my children to play guitar. When I was practicing just for my own benefit, there was never any need to say aloud the names of the notes I was playing. However when teaching somebody else to play, its only natural to say the names of the notes that you want them to play. And if you're going to say them, its only natural to sing them too. If you just call them out in a monotone voice, it sounds awful against the melody coming from the guitar.
Its only been a few short weeks, but I'm already seeing a little bit of improvement. I'm getting better at hitting my pitches, and I think my range is expanding ever so slightly.
Take a few minutes in your practice session to sing the names of the notes you are playing. While you are playing your warm-up exercises would be a good time for this.
There are three benefits that you will realize from singing what you play:
naming the notes will improve your knowledge of the fretboard,
singing the notes will help develop your ear, and
singing the notes will help develop your singing voice.
TIP: Use your electronic tuner to verify what pitch you are singing. If you're off by a semi-tone, it will sound awful and you'll know you're not hitting your pitch. But you could be singing a third or a fifth above the target pitch, so it will sound nice and you'll think everything's cool. The tuner will let you know if you are actually hitting your pitch, or just adding some harmony to it.
Today we'll learn a two octave major scale pattern with its root note on the sixth string. The TAB starts on the C at the 8th fret of the sixth string, so this is the C major scale.
(Click to Enlarge)
This pattern can be slid up and down the sixth string to play the major scale in different keys. If you were to play this pattern starting on the A at the 5th fret of your sixth string, you would be playing the A major scale.
The first and second measure both start and end on a C. Thus, this can be viewed as two separate one octave patterns, with one pattern starting on the sixth string, and the other pattern starting on the 4th string.
ISOLATE THE LOWER OCTAVE PATTERN
Let's put the first one octave pattern starting on the sixth string in box format. The root note C, is in bold.
One octave major scale pattern
Root note on sixth string
The neat thing about this one octave pattern in the first measure is that it can be played starting from a root note on the fifth string, and it will still give us a one octave major scale.
One octave major scale pattern
Root note on fifth string
FRETBOARD REVELATIONS
Let's compare the one octave pattern in the first measure of the TAB above to the one octave pattern we learned in Confession #8 Learn the Major Scale.
One octave major scale pattern
Root note on sixth string
One octave major scale pattern
Root note on third string
These two patterns actually look very similar. The layout of the notes on the:
the sixth string is the same as on the third string,
the fifth string is the same as on the second string, and
the fourth string is the same as on the first string.
The only difference is that when moving up one whole step to switch from the note D to the note E:
in the first pattern, we have to back 3 frets,
in the second pattern, we have to go back only 2 frets.
This observation provides some insight into standard tuning:
On any of strings 6, 5 ,4 or 2, if you move up one string and back 3 frets (i.e. switch from finger 4 to finger 1), that's a whole step.
On string 3, if you move up one string and back 2 frets, that's a whole step.
The way I like to remember these rules is that:
when moving from finger 4 on one string to finger 1 on the next higher string, that's a whole step, and
when moving from string 3 to string 2, the whole step is one fret closer than it is on the other strings.
Remembering these rules will allow you to build a major scale anywhere on the fretboard. Apply the major scale formula from Confession #8 Learn the Major Scale and then use these rules when switching strings.
In Confession #11 - Learn Root 6 Barre Chords! we learned how to play a bunch of different major chords by sliding an E shape chord up the neck, and using our first finger as a barre. There is another very commonly used barre chord called a Root 5 barre chord, or an A shape barre chord.
WARNING! Barre chords can be very hard on your fretting hand. Make sure that you warm-up first (see Confession #6 - Warm-Up!). If you start to feel any pain or discomfort in your fretting had, stop immediately! If you keep on playing, you can do serious damage to your fretting hand.
FIRST, THE A CHORD
Let's take a look at a basic open A chord. Generally, you will use fingers 1,2 and 3 to play the A chord, like this:
But what if you used only finger 3, like this:
Then finger 1 (your index finger) would be free to do other things.
Let's use the 3 only fingering, and then slide it up two frets like this:
As in the the lesson on Root 6 barre chords, if you strum strings 1 thru 5 now, its not going to sound very musical (remember, when playing an A chord, we don't strum the sixth string, so don't do it when you are playing A shape barre chords). When we slid finger 3 up two frets, we changed the pitch of 3 of the 5 strings by 2 semi-tones (see Confession #8 - Learn the Major Scale! if you are unsure of what a semi-tone is), but the pitch of the other 2 strings was unchanged.
EDIT: In each of the 3 diagrams above, the second string should not have an "O" beside it. (It's a pain to redo the diagrams.)
TURN AN A CHORD INTO A B CHORD
How do we change the pitch of the other 2 strings by 2 semi-tones as well? We do this by barring finger 1 across all the strings at the 2nd fret, like this:
Now the pitch of strings 1 and 5 have also been changed by 1 semi-tone. The resulting chord is an B chord.
By barring finger 1 across all the strings at the 2nd fret, we are using our finger as a moveable nut (the 0th fret is the guitar's nut).
Don't worry if the barre with your third finger prevents the first string from sounding. As you'll see in the chart below for the C chord, all 3 notes of the chord are included in the notes played on strings two thru five.
TIP: It takes a fair bit of pressure with finger 1 to properly fret strings 1, 2 and 6. If you aren't using enough pressure, they either won't sound properly or at all. Make sure you are barring just behind the fret. Also, tuck you elbow in at your side. This will provide some leverage to create the needed pressure.
NOW A C CHORD
We can take this shape and slide it up and down the neck to make different chords. For example, if you barre the 3rd fret while holding the same shape with finger 3, you'll be making a C chord, like this:
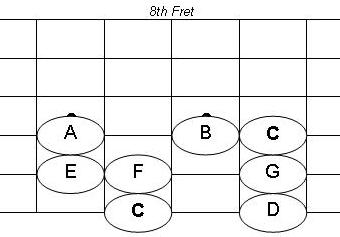
How do you know that this is a C chord? Here is the C chord chart again, but this time with the names of the notes, instead of the fingerings:
This is a C chord because the note at the 3rd fret of the fifth string is a C. That's the note that gives the chord its name.
ROOT 5 BARRE CHORD / A SHAPE BARRE CHORD
Because the name of the chord comes from the fifth string, a barre chord based on the shape of an open A chord is called a "root 5 barre chord". The note on the fifth string is the root note of the chord.
Because it is based on the shape of open A chord, it is also sometimes referred to as an "A shape barre chord".
PUTTING BARRE CHORDS TO WORK
Now that you know how to play a root 5 barre chord, you can play a whole bunch of different chords, just by moving this shape up and down the neck.
This week's video includes an example that is based entirely on root 5 barre chords. The example is a simple chord progression based on the I, IV and V chords in the key of A (being A, D and E major chords). Note the use of the 'folk rhythm' (see Confession #10 - Learn the Folk Rhythm!) over the IV chord (i.e. the D chord played at the 5th fret).
MORE LEARNING THE FRETBOARD
As you are experimenting with the root 5 barre chord, you will be learning the names of the notes on your fifth string.
Note in the chart for the C chord above, that the note at the 5th fret of the third string was also a G.
So, once you learn where a note is on the 5th string, you now also know where to find that same note on the 3rd string, like this:
As you are learning your root 5 barre chords, you are also learning the names of the notes on the fifth string and the names of the notes on the 3rd string.
MORE COOL ROCK SOUND
Take another look at the C chord above. The notes on the bottom 3 strings are C - E - C, the second C being one octave higher than the first. From a theory perspective, these notes are the root, the fifth and the octave in the key of C (I'll explain the theory in a future confession). If you play just these bottom 3 strings, you get that cool rock sound.
Turn up your amp, turn on the overdrive channel, strum the bottom 3 strings, and let them ring!
Barre chords are very popular chords for a few reasons:
One, they are pretty easy to play,
Two, they allow you to play a bunch of chords using only one chord shape, and
Three, the bottom strings of the chord make a cool rock sound.
So what is a barre chord?
WARNING! Barre chords can be very hard on your fretting hand. Make sure that you warm-up first (see Confession #6 - Warm-Up!). If you start to feel any pain or discomfort in your fretting had, stop immediately! If you keep on playing, you can do serious damage to your fretting hand.
FIRST, THE E CHORD
Let's take a look at a basic open E chord. Generally, you will use fingers 1, 2 and 3 to play the open E chord, like this:
But what if you used fingers 2,3 and 4, like this:
Then finger 1 (your index finger) would be free to do other things. No, I don't mean making rude gestures at the drummer.
Let's use the 2, 3, 4 fingering, and then slide each finger up one fret like this:
If you strum all of the strings now, its not going to sound very musical. Why is that?
When we slid fingers 2, 3 and 4 up one fret, we changed the pitch of 3 of the 6 strings by 1 semi-tone (see Confession #8 - Learn the Major Scale! if you are unsure of what a semi-tone is), but the pitch of the other 3 strings was unchanged.
TURN AN E CHORD INTO AN F CHORD
How do we change the pitch of the other 3 strings by 1 semi-tone as well? We do this by barring finger 1 across all the strings at the first fret, like this:
Now the pitch of strings 1, 2 and 6 have also been changed by 1 semi-tone. The resulting chord is an F chord.
By barring finger 1 across all the strings at the first fret, we are using our finger as a moveable nut (the 0th fret is the guitar's nut).
TIP: It takes a fair bit of pressure with finger 1 to properly fret strings 1, 2 and 6. If you aren't using enough pressure, they either won't sound properly or at all. Make sure you are barring just behind the fret. Also, tuck you elbow in at your side. This will provide some leverage to create the needed pressure.
NOW A G CHORD
We can take this shape that our 4 fingers are making and slide it up and down the neck to make different chords. For example, if your barre the 3rd fret while holding the same shape with fingers 2, 3 and 4, you'll be making a G chord, like this:
How do you know that this is a G chord? Here is the G chord chart again, but this time with the names of the notes, instead of the fingerings:
This is a G chord because the note at the 3rd fret of the sixth string is a G. That's the note that gives the chord its name.
ROOT 6 BARRE CHORD / E SHAPE BARRE CHORD
Because the name of the chord comes from the name of the note on the sixth string, a barre chord based on the shape of an open E chord is called a "root 6 barre chord". The note on the 6th string is the root note of the chord.
Because it is based on the shape of an open E chord, it is also sometimes referred to as an "E shape barre chord".
PUTTING BARRE CHORDS TO WORK
Now that you know how to play a root 6 barre chord, you can play a whole bunch of different chords, just by moving this shape up and down the neck.
This week's video includes 2 examples that are based entirely on root 6 barre chords. The first example is a simple chord progression based on the I, IV and V chords in the key of E (being E, A and B major chords). Note the use of the 'folk rhythm' (see Confession #10 - Learn the Folk Rhythm!) over the IV chord (i.e. the A chord played at the 5th fret).
The second example is something I came up with that uses E major and E7 shape barre chords. Lift finger 4 (your pinky) and you'll be playing a 7 chord. In case you are wondering, I am changing keys in this progression. Don't ask me which ones. I came up with this by ear and thought that it sounded cool.
BONUS - LEARNING THE FRETBOARD
As you are experimenting with the root 6 barre chord, you will be learning the names of the notes on your sixth string.
Note in the chart for the G chord above, that the note at the 5th fret of the fourth string was also a G.
So, once you learn where a note is on the 6th string, you now also know where to find that same note on the 4th string, like this:
As you are learning your root 6 bare chords, you are also learning the names of the noes on the sixth string and the names of the notes on the fourth string.
BONUS - COOL ROCK SOUND
Take another look at the G chord above. The notes on the bottom 3 strings are G - D - G, the second G being one octave higher than the first. From a theory perspective, these notes are the root, the fifth and the octave in the key of G (I'll explain the theory in a future confession). If you play just these bottom 3 strings, you get that cool rock sound.
Turn up your amp, turn on the overdrive channel, strum the bottom 3 strings, and let them ring!
Next Week's Confession - Learn Root 5 Barre Chords!
The major scale pattern is the single most important bit of music theory you will ever learn. It is the foundation upon which everything else is built. So it is critical for your development as a musician that you learn this pattern.
If you've seen The Sound of Music, or even if you haven't, then you are familiar with the sound of:
do-re-mi-fa-so-la-ti-do
This is the sound of the major scale pattern.
TIME FOR SOME THEORY
In Confession #5 - Use a Metronome!, I talked about how the piano is an excellent tool for learning music theory, and showed a picture of the C major scale on the piano keyboard:
The first C is the root note of the scale (the one on the left). The second C is called the octave (the one on the right). If the frequency of the first C is 200Hz (Hz or Hertz means cycles per second), then the frequency of the second C is 400Hz, exactly twice is fast (see Confession #3 - Set-up your Guitar! for more on the octave). So when you play the octave of any particular note, the frequency of the sound vibration is twice as fast.
The octave of any particular root note has a fundamental sameness as the root note. This is why it is given the same name. It's pitch may be higher, but it has the same quality as its root note. Thus, we will only find unique notes between a root note and its octave.
For reasons that are unknown to me, it was decided long ago that the octave should be divided up into 12 notes (well... actually, there are reasons in physics for this). Start at the first C and count all the keys up to and including the B. You'll find 12 notes.
For further reasons that are also unknown to me, it was decided long ago that we would ignore 5 of these 12 notes, leaving 7 notes to form the major scale. I don't think physics is to blame for this.
Notice that some of the notes of the scale have a black key between them, and others do not. This pattern of white and black keys makes up the major scale pattern, which in the key of C is:
C-D-E-F-G-A-B-C
Whole Steps and Half Steps
Since we want to be able to play in all musical keys and not just the key of C, we need a way to describe the major scale pattern that will allow us to find it in other keys. We do this by describing that major scale as a series of whole steps and half steps like this:
W-W-H-W-W-W-H
...where W means a whole step and H means a half-step.
On the Piano
On the piano, a W means move up two keys (regardless of colour) and H means move up one key (regardless of colour). If you start on the first C on the keyboard above, and apply this pattern, you will hit all the white keys and finish on the octave, like this:
C-W-D-W-E-H-F-W-G -W-A -W-B -H-C
On the Guitar
On the guitar W means move up two frets and H means move up one fret. So, on the guitar fretboard, the pattern looks like this:
If we tuned our 6th string to a C, then starting with the open string (i.e. the root), this pattern would give us the C major scale. Of course, our 6th string is actually tuned to an E, so playing this pattern actually gives us the E major scale: E - F# - G# - A - B - C# - D# - E.
Tip: Applying scale patterns to open strings helps us visualize the pattern better then staying in one position and changing strings as we move up the sale. Use this technique when learning new scales.
Now in practice, we rarely play a entire scale on just one string (but it can be quite effective - The Cure's "Just Like Heaven" uses a descending scale pattern on the 2nd string for one of its lead lines), so we need to learn a major scale pattern that allows us to stay in one position.
Warm Up Exercise #2 - Major Scale in One Position
Here is a one octave major scale pattern that starts on the third string and finishes on the first string. The numbers 1 to 4 indicate which finger should be used for each note in the scale (where 1 is your index finger and 4 is your pinky). If you play this pattern in 5th position (i.e. starting at the 5th fret), then you'll get the C major scale.
I like to use this pattern as part of my warm-up exercises. I play it ascending and descending like this:
Warm-Up! - Exercise #2 - C Major Scale (Click to Enlarge)
As mentioned in Confession #6 - Warm-up!, warm-up exercises get boring in a hurry, so move this pattern up and down the neck to keep things interesting. For example, if you start the pattern in 7th position, then you'll be playing the D major scale. Try to get to the point where you can play the scale ascending and descending in 5th position, and then seamlessly switch to playing it in 7th position without stopping.
... or a Drum Machine, or a Multi-Effects Pedal, or an Electronic Keyboard
One of the most important skills for any musician to develop
is a sense of rhythm. You may play
brilliantly, but if you can’t play in time with a metronome or other musicians,
then you'll be stuck in your basement forever. To some people, this skill
may come easy, while for others it will take some practice. But it can be learned.
PLAYING ALONG WITH THE RECORD IS NOT THE SAME THING
Now, just because you are able to play along with the record
doesn’t mean that you’ve mastered this skill.
When you play along with the record you have an example to follow and
are subconsciously picking up on other cues in the recording. None of these things will be present if it’s
just you and a metronome, or you and a bass player and a drummer.
METRONOME vs. DRUM MACHINE vs. KEYBOARD
Metronomes are really, really boring musically, but are also
pretty inexpensive. Consider stepping up
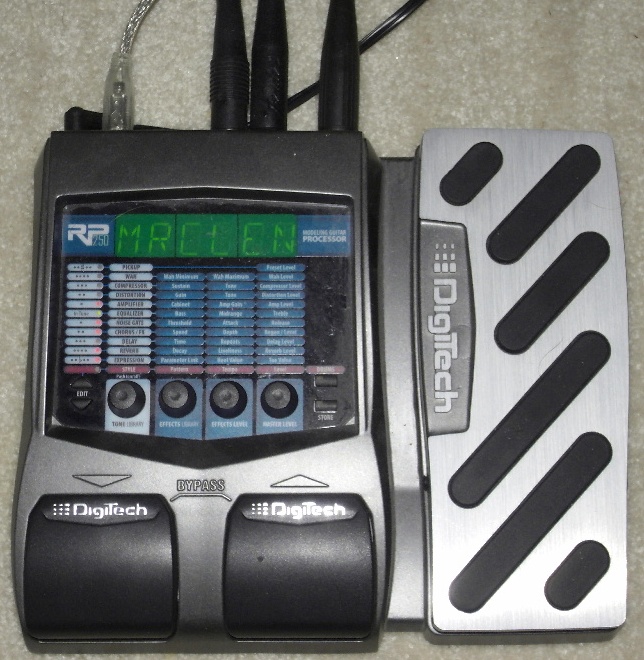
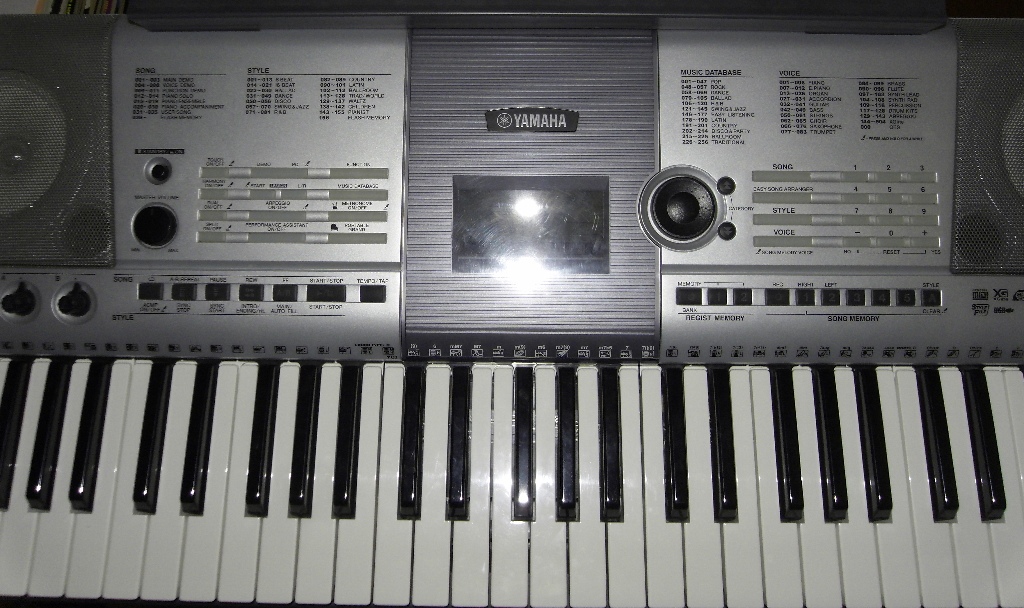
to a drum machine, or a multi-effects unit with a built in drum machine (I have the Digitech RP-250), or better yet an electronic keyboard (I have the Yamaha Portatone PSR-E403). All will provide you with a
variety of beats to practice with.
Digitech RP-250 Multi-Effects Pedal
Yamaha Portatone PSR-E403
An electronic keyboard has some additional benefits:
If it has auto-accompaniment, you can use it for
one chord jams in a variety of musical styles, and
The piano keyboard can be a useful tool for
learning and understanding musical theory because it has easily recognizable
patterns. Patterns are harder to see on
the fretboard, so this can make it hard to grasp musical concepts and
relationships.
Spot the C Major Scale on the Keyboard
Now find it on the Fretboard !?!?!?
USING A METRONOME
Hopefully I’ve convinced you that using a metronome has
many benefits:
·It's like truth serum for your playing. If your rhythm is off, it will show.
·It will help you develop a feel for a steady rhythm. You'll play better when there isn’t a beat available.
·It's great for rythym training exercises (e.g. learning to play 16th notes at 100 bpm)
The most important thing to remember when using a metronome is to: Know the part before playing with the metronome! There's no point in putting a beat on until you know the part you are trying to play. If you are constantly starring at the TAB and still working on fingerings, the beat will just drive you mad and hinder your progress. You don't have to have the part fully memorized, but your fingers should already know where they want to go as your eyes move quickly over the TAB.
The other most important thing to remember is to:
Start Slowly!
If you set a tempo that is too fast, then you will make
mistakes. Worse, you will probably
persist at that tempo (You’re probably telling yourself that “I should be able
to do this!”) and keep making more mistakes.
What ends up happening is that you practice making mistakes instead of
practicing playing correctly. Don't practice making mistakes!
Start with a tempo that you can play comfortably at without
any mistakes. Stick at this tempo and
develop a feel for the part you are practicing and develop your muscle memory
for playing it correctly. Slowly speed
up the tempo, even if it’s only 4 bpm at a time. If you speed up the tempo and find yourself
making mistakes, go back to the original tempo and practice playing it
correctly.
Remember, you are not going to get a new part up to tempo in one evening. It may take several days of slowly increasing the tempo to get up to speed.
Don't practice the same thing for more than 5 or 10 minutes per session. If you practice one part for 30 minutes, it is more likely to hinder than help your progress. Keep the practice short and give your brain a chance to digest.
KEEP IT SIMPLE
While you are developing a feel for rhythm, you need to keep
it simple and slowly increase the difficulty.
Start with just whole notes and strum a chord on every beat 1. If this is going well, then try strumming on
beat 1 and beat 3 (i.e. half notes).
Next step up to quarter notes (i.e. beat 1, 2, 3 and 4), etc.
Alternatively, stick
with whole notes, but change chords every time beat 1 comes around. Try
the following I-vi-IV-V7 progression in the key of G:
G-Em-C-D7
I’ll talk more about this progression in a future
Confession.
FINISH ON A HIGH NOTE
The last thing you hear is what’s going to stick in your
brain. This is why it is critical that you
finish your practice session by playing the new part you’re learning
correctly. It’s great to increase the
tempo during your practice session and push yourself, but always finish
your session by slowing it down to a comfortable tempo and playing the part
correctly. This is what your brain will
remember.